Getting started 3 - Creating an event in the calendar
Before finetuning the configuration to your business, let's create an event in the calendar first, to get a feel of the mechanics:
- Navigate to the week calendar. If it's not visible, then click the calendar icon, which is the third from the right in the top navigation.
- Click anywhere in the calendar on an empty space. This will open up the details pane.
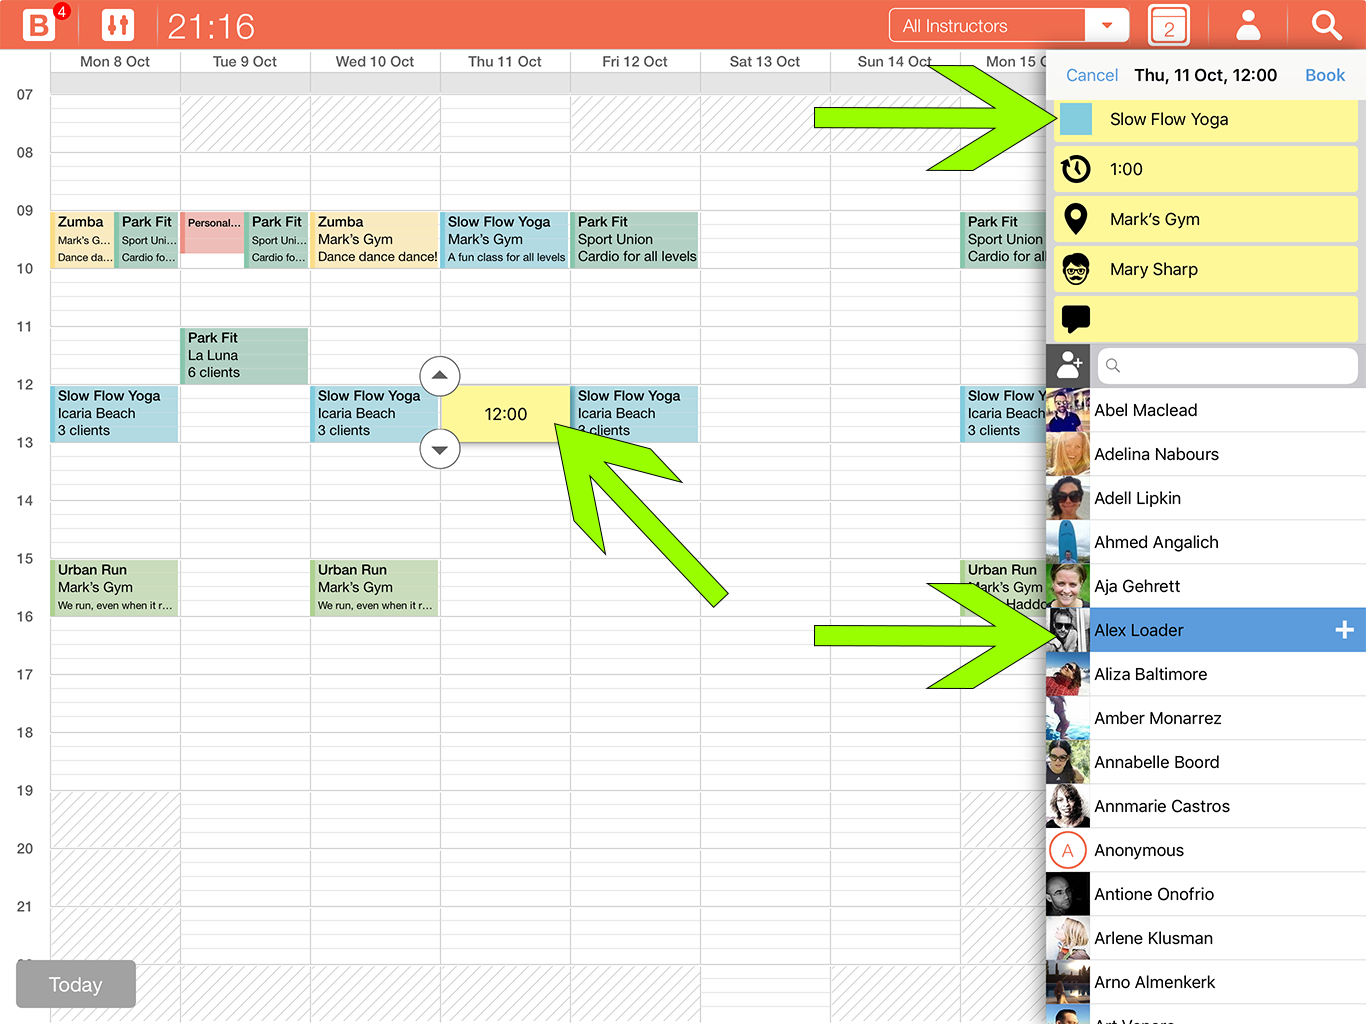
- Starting at the top, click the first yellow field, this will invoke a popup where you can choose an activity. Pick an activity from the list and hit Done.
- Do the same for the other fields: Duration, Location (you can define these in the settings) and Instructor (Studio license only)
- The last field is used for a description of the event. It can be displayed on the web calendar for your clients. Examples are: "Bring water", or "High octane exercise for all levels".
- Optionally - if you have clients who prebooked - you can add clients to the class. Below the search field you will see a list of clients. Double-click one to add them to the class. If you do not have any, you can create a new one by clicking the human+ icon next to the search field. You can import one or create a new one. For test purpose you should create a fictional one with your email address.
- You can now save the class by clicking the Book button.
- The app now shows a preview of an email with the client(s) as recipient(s). Make sure this all looks good and click the Send button to send the booking confirmation.
- Note that you can edit the mail/message templates in the Settings >Message templates.